Do you change your plot settings a lot? Do you plot drawings in various ways, for example, a draft plot and a final plot? Or do you create various layouts and need to plot them differently?
You can save page setups, which contain settings for plotting. A page setup is attached to a layout, so you can easily switch settings from one layout to another.
Creating a page setup is like specifying plotting settings, so you should know how to use the Plot dialog box first.
AutoCAD is meant to be customized, but customization is one of the most complex features of AutoCAD. Gain the knowledge you need to be a master at customizing AutoCAD!
How to plot a drawing to scale
(1) Begin by opening the drawing file in AutoCAD. Initially, you will see the drawing displayed in Model Space; this is the default environment for drafting but not for plotting. Before proceeding, make sure that you are using the "2D Drafting & Annotation" workspace so that the options available on the ribbon match those in this tutorial.
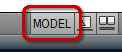 (2) In order to start configuring a scaled plot, we must switch to paper space. Do this by clicking the "MODEL" button on the right hand side of the status bar. This button is a toggle and changes to show the current status of the display.Once the button is clicked, the display will change to show your drawing within a viewport on a virtual sheet of paper and the text on the button changes to "PAPER" to indicate that you are now in paper space.

(3) The next step is to tell AutoCAD how big the sheet of paper is.To do this,click the 'Output" tab on the ribbon and then click the "Page Setup Manager" button in the "Plot" panel.The age setup manager dialogue box will appear,showing a list of page setups. The default setup is called"*Layout1*" and this is highlighted. We have the choice of either creating a new layout or modifying the existing default layout. If you intend to create a number of layouts for different paper sizes and different scales, it's a good idea to create a new layout but it this case,We'll keep it simple and just modify *Layout1*. Click the "Modify..." button to display the page setup dialogue box.


(4)The Page Setup dialogue box looks a bit complicated but in fact you need only make some changes only. In the Page Setup Manager, click New. Enter a name. If you have existing page setups, You can choose one from the Start With list, to avoid having to create all the settings from scrat-ch. Click OK.
1. In the Printer/Plotter section, choose the desired printer or plotter from the dropdown list. This lets you use different devices for different layouts.
2. In the Paper Size section, choose a paper size. This allows you to use different sheet sizes for different layouts.
Paper size:
- A0 => 841 x 1189 mm
- A1 => 594 x 841 mm
- A2 => 420 x 594 mm
- A3 => 297 x 420 mm
- A4 => 210 x 297 mm
3. In the Plot Area section, choose what you want to plot. Your choices depend on whether you’re on a Model or Layout tab, and can include: Layout, Display, Limits, Extents, and Window.
4. In the Plot Offset section, you can specify an offset from the lower left corner. You might do this to place several plots on different parts of one sheet of paper. You can also enter the plot by checking the Center the Plot check box.
5. In the Plot Scale section, set the scale from the drop down list, or check the Fit to Paper check box. You can also type a scale int eh text boxes. Most layouts are plotted at 1:1 because you scale the individual view ports. You can also check the Scale Line weights check box to scale the line weights along with your drawing.
6. In the Plot Style Table section, choose a plot style table if you want to use one. Plot styles determine how plots look and let you create different looks for different plots.
7. In the Shaded View port Options section, you specify how a model plot (not a layout plot) looks. You can choose from visual styles and resolution options. The Shade Plot drop-down list is not available if you’re on a Layout tab. You can also choose a quality from the Quality drop-down list.
8. In the Plot Options section, you can choose whether or not you want to plot line weights and plot styles. You can also choose whether you want to plot paper space objects last. Finally, if you created 3D objects in paper space (who ever does that?), you can hide their back lines.
9. In the Drawing Orientation section, you can plot portrait, landscape (the default), or upside down.
10. Click the Preview button to see if you like the result.
11. Click OK to return to the Page Setup Manager. Select the new page setup, click Set Current, and click Close.
(5)To modify a page setup, open the Page Setup Manager again, choose the page setup, and click Modify.
To use the page setup, start the PLOT command. In the Plot dialog box, choose the page setup from the Name dropdown list in the Page Setup section at the top of the dialog box. Then plot the drawing.
No comments:
Post a Comment